Friday, March 4, 2016

Layering Sunflowers

Hi all, welcome to the blog today.  It's been a long time but I think that will be the way it is for the time being.  Inspiration isn't coming consistently these days!   I've had some sunflower things sitting on my work table for  several months and I really wanted to do something with them.  Linda, from The Funkie Junkie Boutique, always places wonderful little gifts in orders (thanks, Linda).  In one order back in late August or early September she gifted me with sunflowers!  I love sunflowers and always have them in the house late in the summer.  They are so cheerful and bright and make me smile when I see them.  So, I knew right away that I wanted to use some of the things in the package for a sunflower tag.  But, everything sat on my table and life and the holidays intervened and no tag materialized!  Now it's almost spring here and I'm thinking about our garden and the different flowers and vegetables we're going to plant this year.  I've seen a few new sunflower varieties that I want to try and that sent me to my table to make my tag!  Over at the Frilly and Funkie Challenge blog the theme this time is Layer It Up so I thought I would do just that with my tag and all the sunflower things I had sitting there.

Here is what I came up with.


I used a size 8 tag and I sprayed it with Fossilized Amber Distress Spray.  I used a flower stencil and sprayed again with Pirates' Plunder Gold Moon Shadow Mist from Lindy's Stamp Gang.  When all that was dry I sprayed Sunflower Sparkle Perfect Pearls Spray lightly over the entire tag.  Using Fossilized Amber Distress Ink I stamped a sunflower stamp randomly over the background.  It's very subtle and doesn't show in the photos but it adds some dimension to the background.   From my stash I took a sunflower cocktail napkin and used gel medium to adhere that to the bottom left of the tag.  Tim Holtz Thinlets dies are fun to use and I decided to use the diamonds to cut out part of the tag.  For a backing I used one of the papers from my favorite Graphic45 designs, French Country.  I attached the tag to the piece of paper and then cut it to size.  As part of Linda's gift was the botanical print of the sunflower.  I glued it to a piece of chip board and edged it with Vintage Photo Distress Glitter.  I attached it, and a definition of "sunflower" that I tore out of an old dictionary, to the tag along with a banner sticker and the Le Jardin sticker from the Graphic45 paper set.   The brown dot stickers filled in the space above the botanical print.   The button and sunflower charm were part of the gift.  I decided to add some definition to the diamond cut outs by outlining the inside of each one with a Pitt Pen in Sepia.  I also outlined the strip of dictionary paper and the Le Jardin sticker with the pen. 
 
 
Here are some details.


I'm going to enter this in the Frilly and Funkie challenge since I really "layered up" the background, the embellishments and the back of the die cut area!  
 
 
I want to thank everyone for stopping by today.  I appreciate it especially since I haven't been around very much at all lately.  I hope you have a wonderful day and that Spring isn't too long in coming for all of you!


Wednesday, January 13, 2016

More Zentangle

Hello, everyone!  Welcome!  I hope you have gotten back to normal after the bustle of the holidays.  I'm slowly getting back to my old routine.  It had been disrupted all Fall because of renovations we were making to our house which lasted until the beginning of December.  But, since that's done and the holidays are over I think I'm ready to settle into winter. 

Unfortunately, my muse has not been seen around here since late September and so I haven't had much inspiration from her!  So, I had decided last week to start slowly getting back into Zentangle since it is a relaxing form of art and I enjoy doing it.  I thought I would start back at the beginning with a tile, pen and pencil and not try to do anything that wasn't basic.  Then on Monday Laura, The Diva, announced her weekly challenge, #250, which was going back to old school Zentangle.  She wanted everyone to use a tile, pen and pencil!  Sounds like synchronicity to me!  So, yesterday I sat down and got back to basics!  Here is the tile.


My first attempt for this year didn't turn out too badly, I used some favorite tangles and now I think I'm ready to try to wake up the Muse a little more!!  We'll see.  I'm going to link this to the Diva Challenge and be happy to have done some art!
 
That's about all I have to share for today.  Thank you for visiting.  I really appreciate having you stop by the blog!


Tuesday, December 29, 2015

Merry Christmas and Happy New Year


Greetings of the season to all of you!  I hope you had a wonderful Christmas spent with family and friends!  Our family was together and we shared the day with friends who are like an extended family.  It was our tradition and we love it!  Above is a photo of our tree.  It's full of ornaments hand made or gifted from friends, some have been purchased, but always because we love them.  Certainly not a designer tree, but full of love and memories spanning 40+ years!  It's the star of the holiday decorations for us!
 
 
My absence from the blog this year is because there was so much going on in our home.  But, I'm hoping the New Year will have me back in the studio creating.  I did have one new decoration to add to the mix this year.  It was a Zentagle Inspired Art piece that I had started in a class last year and finished after the holidays.  I just love the simplicity of it.  


I framed it in a simple black frame and displayed it on a black easel.  It was the biggest Zentangle piece I've done and it was a challenge to work that big.  Here are some other photos.


While I love sparkle and shine, and lots of glitter for the holidays, the simplicity of Zentangle is so appealing. 
 
 
Well, my friends, as we are at the end of another year, I wish all the best that life has to offer for you.  I thank you all for following along on my rather erratic journey in creativity and I'm so appreciative of all the comments you leave.  Many blessings in the New Year!


Saturday, November 21, 2015

ATTS:8 What's Your Bag!

Hello, everyone!  It's hard to believe that it's almost Thanksgiving here in the US.  I often find that Fall seems to more quickly than any other season.  When my kids were young and still in grade school and high school I thought that was the reason.  But, now they're adults and out of the house and I still find that this beautiful season just whizzes by.  I try to enjoy it as much as I can.  This year it's been difficult to really find time for much of anything.  A variety of family things have kept us hopping.  But, now it's time for Therese and Christine's blog challenge A Time To Stitch.  This is the 8th challenge, which is also hard to believe!  The theme this time was What's Your Bag.  We were supposed to bead embroider on a purse, amulet, evening bag, or some other bag of our choice.  I cheated a little.  I had made an evening bag with a bead embroidered flap at the request of my friend, Christen Brown.  She was writing a book on different types of embroidery and asked if I would do a bead embroidered bag of some sort.  So, I made a little clutch bag out of pintucked silk fabric and I embroidered the flap.  Here is what it looks like.


I made the pattern for the shape of the flap and then traced it on Lacy's Stiff Stuff.  I traced a rough outline of spaces I wanted to fill and started stitching.  I never have a firm idea of what a design is going to look like.  I wanted this to hint at an abstract garden surrounded by rocks and stones.  The colors were chosen to coordinate with the fabric.  Here are some details.


So, there it is.  I had fun making it.  I love doing bead embroidery.  I love making it textured and using different shaped beads. 


I want to thank Therese and Christine for hosting this challenge.  It's really fun to participate and I can't wait to find out what they decide to do next time. 


Thank you all for visiting with me.  I really appreciate you stopping by.   

Friday, October 30, 2015

Something Wicked

Hi, everyone!  Thanks for dropping by today, the day before Halloween!  I can't believe we're this far into the Fall season already.  Of course, things have been hopping around here so the time has gone by quicker than usual. 

I was really sad that I had not found the time to make any thing for Halloween or Fall/Thanksgiving.  Then The Frilly and Funkie blog had the theme of Something Wicked!  I really wanted to participate in this challenge!  It would force me to make at least one Halloween project.  I even had the base for what I wanted to do.  Well, I finally made the time and made this:


I had gotten the paper mache witch's hat at Michael's last year on sale.  I had plans to do something with it this summer.  Well, that didn't happen!  I always plan to do Fall and Halloween things in the summer but it rarely happens.  Anyway, I thought this was my chance to use the hat.  I painted it with black gesso and used Peeled Paint Distress Glitter on the edge of the brim.  I glued black feathers and glittered leaves as a hat band and then used a black and an orange die cut cat that I had from another sale package from Michael's.  The little purple glittered spider is also from the same package of die cuts.  I found some little skulls in my stash and glued that in front of the cat.  Using an awl, I poked a hole in the point of the hat and inserted a black wire with a glittered star on it.  Here you can see some details.


This is about as spooky as I get!  I love Halloween but not the way Halloween is now.  I don't like the gore and horror that has become so prevalent now.  I like the vintage Halloween of cute Jack-o-lanterns, cute little witches, black cats to go with them, and cute little ghosts out on the prowl .  So I do a lot of my own things for Halloween since I love to include it in my Fall decorating. 
 
 
I'm so happy that I decided to use this hat for the challenge.  I'm heading over to the Frilly and Funkie blog now to post it.  Check the other entries.  They are always great!
 
 
Thanks again for stopping by today.   I hope you enjoy your Halloween!


Tuesday, October 20, 2015

An Exploding Box!

Hello everyone!  It's a gorgeous warm Fall day here and I wanted to share a new project with you.  Known as an exploding box, it's a project I've wanted to try for a long time.  I love boxes and these are so easy to make and so much fun to open!  My friend, Patti, is a certified Zentangle teacher and she gives classes at her shop, The Queen's Ink.  She does intro classes and follow-up classes in basic Zentangle but she also offers seasonal classes.  I'll share last year's Christmas project as we get closer to the holidays.  This year for the Fall season she taught an exploding box with Zentangle components.  Technically it's called Zentangle Inspired Art, or ZIA for short.  Whatever you want to call it, I called it fun!  Here's a picture of the box.


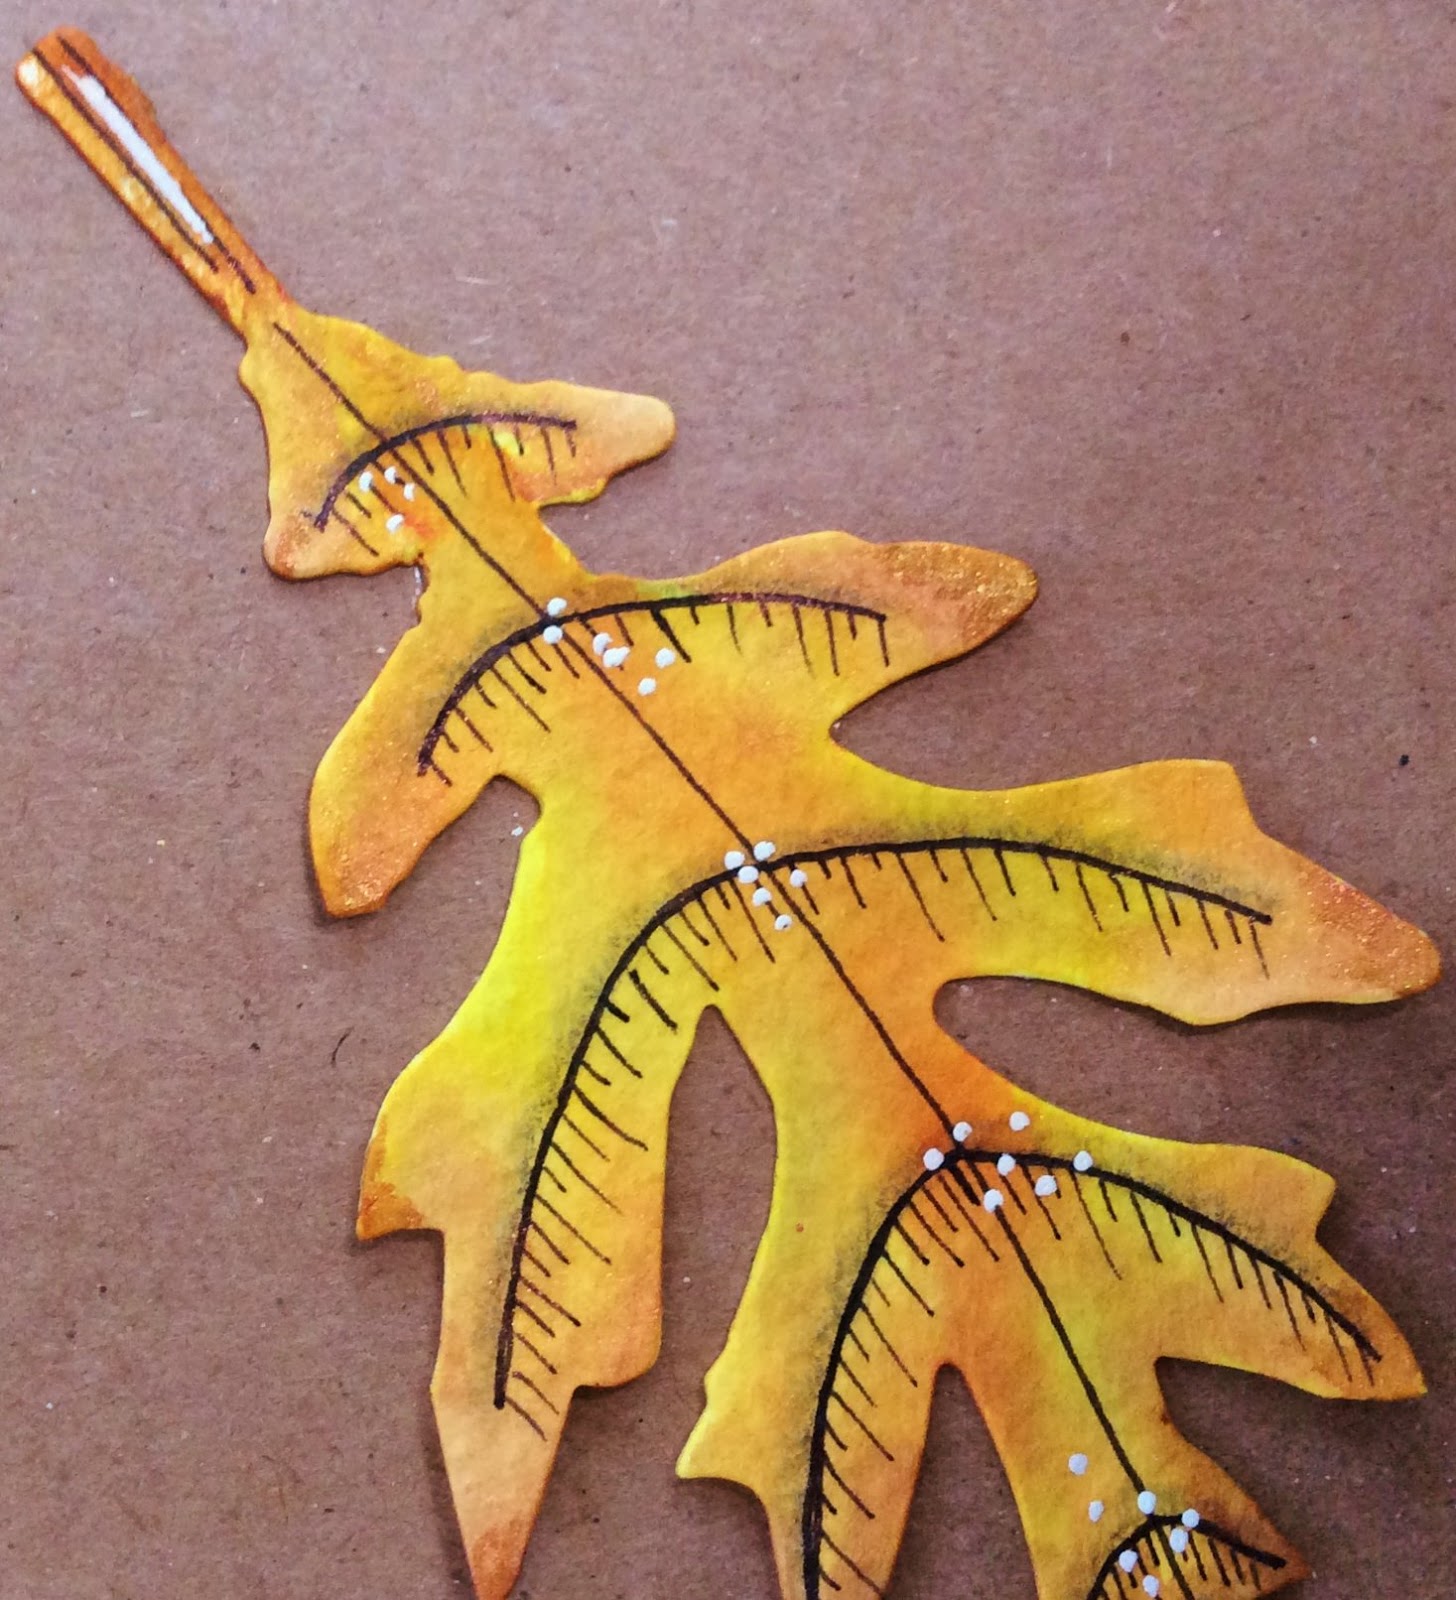
We started with two pieces of 12x12" cardstock for the top and bottom.  The top is made with origami folds and the bottom was folded and cut so that it would form a box.  We cut out stamped images of the leaves and acorn and then did the tangles.  I used Distress inks and a water pen to watercolor the leaves.  The acorn was stamped on kraft cardstock so I just lightly colored some shading on it.  Patti had used white gel pen highlights on her leaves and I was really impressed with the way it made the designs pop.   I did the same and it's amazing the difference.  I chose an orange CS square to create a background for the grouping of leaves and acorn and did some pen work around the edges.  I glued the leaves down and use dimensional glue dots for the acorn. 
 
But the magic happens when you open the lid!   Here is what it looks like.


You may be able to see that there are two levels of panels inside the box. You can add more levels if you want.   Once the lid is taken off the box falls open, or explodes, and you can attach anything you want inside.  I love when there are dimensional things in the middle.  I used acorns and some descriptive word stickers for Fall around them.  Then I used the Tim Holtz Tattered Leaves die and his small pumpkin and acorn die to cut watercolor paper for the leaves and pumpkin and acorns I used on the panels.  I did Zentangles on each one and used Distress inks to watercolor them.  I also added some shimmer to these with Lindy's Stamp Gang Magicals.  They are dry shimmery pigments that I use with a water brush and then highlighted with the white gel pen.   Here are some of the panels close up.  Unfortunately, the shimmer doesn't show up in the pictures. 


Each panel has a leaf or the acorns or pumpkin.  I just love handing it to people and seeing their reaction when they take the lid off! 
 
 
I was so pleased to finally have a reason to make an exploding box.  It seems that right now if I don't have a reason to sit down and work on a project I don't find (or make) the time.  That has to change, for sure!
 
 
Thank you for visiting with me.  I hope you're enjoying this glorious time of year!  The leaves are starting to change into their lovely colors right now and it's delightful to see.  Have a wonderful day!


Sunday, October 4, 2015

I'm back, maybe!

Hello on this dreary Sunday morning on the East Coast of the US!  I may finally be back to creating and blogging!  I say "maybe" because there is a lot going  on in my world.  We are doing some upgrades in our kitchen and family room.  You know how they always say that once you start something like this you find that the job grows bigger!  Well, this has lived up to that saying and it's gotten a little more involved than we thought it would.  And, being the kitchen and family room it's been rather disruptive.  But, I'm excited about the changes we're making and it all should be done by the beginning of December, just in time for me to turn into the Christmas elf and decorate to my heart's content!  Since I can't really do much in the rest of the house I'm hoping that now that the major decisions have been made I can get down to my studio and finish projects that have been around in various states of completion all summer.   We expanded our garden this year and the weather wasn't too hot so I was able to spend more time out there which is why not many projects were finished, or even started.  Hopefully that will start to change now.  I really miss the creative process even though I consider gardening creative. 

Having said all that, I did manage to finish one beading project.  It wasn't terribly involved and didn't take long to do!  But, I love it and I wanted to share it with you.  It's another geometric beadwork project inspired by Kate McKinnon.  I kind of teased it in my last post on who inspires me.  You can read that here.   Here is the completed pendant. 


It starts with a warped square which I love stitching.  I made an  entire bracelet in warped squares last Fall.  You can see that one here.   The directions for stitching a warped square are in Kate's first book on geometric beadwork, Contemporary Geometric Beadwork.  Early in August Kate sent out an email with the idea for a new project, create a warped square and then work and exploding round and keep going until you had the number of rounds you desired.  The exploding round is one of the innovative concepts that Kate came up with while working on the book.  It's difficult for me to explain it so that it makes sense but Kate has a wonderful YouTube video that makes it all clear and you can also find the instructions in her book.  I admit that I wasn't sure how it worked when I read the printed instructions but once I watched the video it was easy to do. 
 
I started with the warped square that I turned into the bail for this pendant and from there stitched the largest square. On the final round I added drops for the corner beads.   I did 2 more squares, the medium and small, and then stitched the smaller squares.  Then I played with how I wanted them to be arranged and the pendant you see is what I came up with.  I love it and it's light weight and fun to wear. 
 
Here are a few details.  


As I said, it was fun to do and didn't take very long at all.  Which is probably why I finished it!!!   I chose the colors for a vineyard feel.  I'm in love with geometric beadwork and I'm working on a cuff bracelet that is coming along slowly. 
 
 
I want to thank all of you for visiting me especially after such a long break from blogging.  I really appreciate your visits and all your wonderfully kind comments.  Have a wonderful day!


Sunday, August 30, 2015

Inspiration: who, what, where

Hello, everyone!  I have been gone from the blog for most of the summer.  And, the summer has gone sooo quickly!  It's not been a very productive summer for me as far as art is concerned.  I do have a lovely garden and lots of flowers and veggies to show for my effort, but not much in the way of beads, metal, or paper.  I think gardening is creative and so that has filled the void of not much work in the studio!  But, I haven't stopped working on projects that I'll eventually finish and share with you, it's just that I don't seem to finish any of them!  I'm working on a new geometric beadwork project right now and it's got my muse going big time!  So, I'll be sharing that first I'm sure. 

The last few days I've been thinking about inspiration and who or what inspires me.  With all the different mediums I've worked in there have been many artists who have inspired me with their work.  While I have changed mediums over the years (even though my heart still loves the fibers and fabrics I used to devote my time to) I still follow those artists that I loved then.  Now that I work primarily with beads and metal and paper art I have inspiration from other wonderful artists.  But, I also find that I'm not only inspired by artists, I'm inspired by colors!  In fact, I think that is a bigger inspiration than any one person.  The colors in nature and flowers, the colors of fabric and fiber. All of that is a great influence on what I work with and what project gets me excited.  The new project I mentioned is taking it's inspiration from the change of the seasons and vineyard hues that I love this time of year. Autumn is a great time of inspiration for me.   This new project is also inspired by the wonderful work of geometric beadwork artist, Kate McKinnon.  She is one of the artists that is exciting  me right now.  Her work in geometric beadwork is amazing and she has gathered a group of wonderful artists to further the art of geometric beading.  Here is a sneak peak:


And, another Geometric cuff inspired by the colors of Autumn leaves.


To stay on the subject of beading and bead artists, two bead artists I've followed since before I started doing bead embroidery or bead weaving are Sherry Serafini and Laura McCabe.  These two women create the most beautiful beaded jewelry and accessories and I have loved their work since I discovered them before I started beadweaving.   I don't remember how I found them and their work but I've ripped pictures from magazines and I have their books.  I just love looking through them for the eye candy and inspiration they provide.  I've been fortunate to have been able to take a workshop with each of them this year.  I'm working on the project from Laura's workshop which I took last week.  It's in pieces so I'll share it when I've finished it.  It's a beautiful necklace.  Sherry's bead embroidered workshop was in the spring and I finished a gorgeous Shibori cuff bracelet.  You can read about it here and this is a photo of it. 


But, then there is the paper art which I have become so enamored of in the last few years.  My daughter was always the paper artist in the family.  I loved what she did and finally started doing some projects myself.  We are fortunate to have a wonderful local paper arts store and to call the owner our friend.  As a birthday gift to my daughter about two years ago I signed us up for a class with Seth Apter.  That weekend of classes opened up new doors to me and Seth has become a great inspiration.  Not only is he a wonderful, fun person but his art and teaching style is fantastic.  Since that first class we have taken several classes from him and I was lucky enough to take a week long book making class with him this spring (thanks to my wonderful husband).  I've blogged about some of the projects we've done in class but here are some photos. 
 
 
From a stenciling class last winter.


A section of a collage class project.


There are so many artists I find inspirational but these three are people I go back to again and again  even if I just want some eye candy when the muse is on vacation!  In thinking about all this I still feel that color and nature are some of the biggest influences on my work.  Color inspires most of what I do.  I turn to my favorite artists for ideas on technique or style always turning things around to make them my own! 
 
Thank you all for visiting with me and thank you if you stuck with this long rambling post.  I'm hoping to get back to more regular blogging now that summer is winding down.  I hope you have a wonderful week and take some time to think about who and/or what inspires you!  


Friday, July 24, 2015

Mail Art

Hi, everyone!  It's been a long time since I've been on the blog.  Summertime is always a busy time and I love every minute of it!  I do a lot of dabbling in the summer and a lot of gardening but not a lot of computer time.  I love being outside enjoying the long days.  So, studio time suffers and that's okay because ideas keep percolating and eventually I'll get to them.  For now I want to share something I did finish yesterday.  Our young goddaughter is going to Girl Scout camp alone for the first time next week.  Her mom asked if we would send her a snail mail letter to make her feel more comfortable.  Apparently, the leaders suggest this for first time campers.  So, of course, I said we would send her a note and I would do some mail art on the envelope.  So, that's what I did this week and I had a blast doing it!  I decorated the front and back of the envelope and the front of the note card.  I hope she'll like it.  I think she will!  She loves art and crafting so I think she'll enjoy getting this in the mail.

Here is the front of the envelope.


I traced a stencil for the flowers and another for the leaves.  Then I filled in with Zentangle patterns and colored it with colored pencils.  I didn't want to use water soluble markers in case it got wet and I don't have enough colors of permanent markers to make it as colorful as I wanted.  The back of the envelope looks like this.


I think this phrase, which I first saw on a Mary Engelbreit card, is so cute.  I thought it would make her giggle so I put it on the back of the envelope.  


This is the front of the notecard.  Once again I traced a stencil and used Zentangle patterns to fill in each petal and colored it with pencils.  I love doing those little Zinger flowers and the related patterns so I used them for a border along the bottom of the card. 
 
 
I'm really pleased with the way the whole thing turned out.  It's bright and cheery and I hope she enjoys getting some mail.  I think she'll do fine with her first trip to camp on her own.  She decided she wanted to go with her friends so I think she'll have a great time. 
 
 
Thanks for joining me today.  It's been a long while since I've shared anything with you and I appreciate you stopping by to visit.  Have a great day!


Monday, June 29, 2015

Bead Emboidery Sherry Serafini Style

Hello everyone!  Welcome!  Today I want to tell you about a workshop I took back in March with Sherry Serafini.  For anyone who loves beadwork, and bead embroidery especially, Sherry is a rock star!  At least for me she is!  I've loved her work since before I really started making beaded jewelry.  I was using beads on my wearable art jackets but I wasn't beading to make jewelry.  I don't remember how I discovered her but when I did I knew I had to do what she did!  Which meant I would eventually start doing bead embroidered jewelry, and about 7 or 8 years ago I did, never thinking I would get to take a class with Sherry.  When Kathy at Bead Soup said she was coming for a weekend of classes I signed up!  I took one class that weekend and it was wonderful.  I had never met Sherry and I was thrilled to find that she is a warm lovely person.  She is truly beautiful in all ways! 

The class I signed up for was a bead embroidered cuff using shibori ribbon.  We had several colorways to chose from in the kits and since I was Spring starved by that time in the winter, I chose a very spring like colorway.  Here is a picture of the cuff I ended up with.


Each kit had different cabs and beads and general directions.  But, Sherry encouraged each of us to lay the ribbon any way we chose and to use the beads and the cabs as we wanted.  So we didn't end up with cookie cutter bracelets.   I don't know if anyone finished their cuff in class, I don't think so, but I didn't because I always want to take my time and decide where I want to go next in a bead embroidered design.  So, that meant I could go home and pull some other beads, favorites of mine to use in bead embroidery.  Glass donuts and lentils are two favorites and I tend to use one or the other, sometimes both, in a design.  In this cuff I used both!  Here are some details of the cuff.


You can see the donuts in the upper right and the lentils on the left.
 
 
I also added some matte AB firepolished bead to the mix because the color was perfect with the shibori.


This class was a wonderful experience.  Sherry is delightful and is looking forward to coming back to Bead Soup.  And, I'll be there because I wouldn't miss one of her classes!
 
 
Thank you all for visiting me today.  I really appreciate your visits.  I'm not a faithful blogger but I enjoy getting to hear from you so much.  Have a wonderful day!  

Monday, June 15, 2015

Mixed Media

Hi everyone!  Welcome!  Today I want to share a mixed media collage I made last weekend in a class with Seth Apter.  Any of you paper artists that haven't taken a class with Seth are really missing a great experience.  My daughter and I take all of his classes when he comes to our local paper arts store.  And, I had the great good fortune to spend 5 days in a workshop with Seth and Orly Avineri last month on beautiful Whidby Island off the coast of Washington state.  I'll share some of that workshop in a future post.  But, for now I'll show you my newest collage.

The class was on the basics of collage.  We started with some small pieces that illustrated the basic principals of collage.  Once we were clear on the basics we painted layers on a piece of art paper.  Seth's technique for painting layers is fun and creates a beautiful rich background of color and texture.  Once the backgrounds were done we then built our collages using ephemera that we had in our collections. Unfortunately I don't have any process photos.  I'm really bad about doing that because I get so into the process that I don't think about taking a picture until it's too late!   Here is what my finished collage looks like.


After we finished painting the paper we stamped and made marks with inks and pens.  I used a stamp that I cut in an eraser at the 5 day workshop as one of my mark making tools.  It's the chop that is placed randomly around the background.    I wanted to use the phrase because I really believe that, for the most part, we are responsible for the lives we live.  I loved the focal print that I chose and by using the window die cut it seemed to fit the phrase.  Not a door exactly but a window at least!  I wanted to bring another color into the compostion so I used a die cut I had brought along.  The piece just seemed to come together as I looked through the papers I had chosen to take to the class.   Here are a couple of details.


In the picture above you can see that I cut the flower above the frame so that it drapes over rather than having the bottom not show at all.  I love little details like that. 
 
I have plans to be busy both with beading and paper art this summer.  I hope I can accomplish a lot of what I want to do.  I'll share when I can.
 
Thank you all for visiting with me today.  I really appreciate that you do.  Have wonderful day and make some thing wonderful!


Saturday, June 6, 2015

ATTS7: Bead Embroidery

Hello to all my friends and visitors.  It's been a long time since I posted here but it's also been a very busy month.  Spring finally arrived and we were getting the garden ready for summer.  Then we left for a wonderful trip to Washington state to visit family and sightsee and make wonderful mixed media art!  I'll post about it soon.  I'm still unpacking all the stuff!!

But, this post is about A Time to Stitch 7.  This challenge was created by Therese and Christine and we're now up to the 7th round.  This time the theme is bead embroidery.  I love bead embroidery because it takes me back to my fiber days when I was making wearables and wall hangings.  And, I love it because I love anything that takes a needle and thread through fabric!  Here is what I created.


I had wanted to work with black, white, grey and yellow for a summer project and I just happened to have a grey square Lunasoft cabochon.  I wasn't sure of the shape I wanted the pendant to be so I just cut the backing a little larger than I needed and bezeled the cab.  I had pulled the square link out of my stash and knew I wanted to use it for an open space to have fringe pouring out.  So, once I glued that in place I then had my shape.  The grey Lunasoft really didn't look that great once it was bezeled.  It kind of reminded me of the old small TV screens of the '50s.  I've just revealed how old I am!!!  So, I decided to glue another square link to the center of it.  Instant love!!  I made the fringe out of size 11 seed beads and clear AB glass rings.  I love glass rings for bead embroidery and usually find some where to use them in a piece.  Making a loopy fringe out of them was something I found in one of Robin Atkins' books.  Once it was finished it needed a bail.  I decided to use Delicas to make a warped square and attach it to the top of the pendant.  I really like the way the bail turned out.  I hung it from a silk covered cord necklace.   Here are a couple of detail photos.


Bail attached to the back  of the pendant with a size 8 and 15 seed bead.


I want to thank Therese and Christine for all the work they do to get this challenge going.  Please visit the other artists who are participating, too.  I'm sure you'll be inspired by the beautiful work they've done.  Here is the list of participants.
 
 
1.       Therese (Host) 
2.       Christine  (Host)
3.       Amy
4.       Lola
5.       Lori F
6.       Kim
7.       Becky Pancake
8.       Karin G.
9.       Debbie (Kepi)
10.   LizE
11.   Maryanne
12.   Paula
14.   Wendy
15.   Janet
16.   Jasvanti
17.   Ginger
18.   Alicia
19.   Bobbie
20.   Shirley
21.   Sarah
22.   Cynthia
24.   Lizzie
25.   Samantha
26.   Sally
27.   Niki
28.   Karen W.
 
Thank you all for visiting with me.  Have a wonderful day!
 

Monday, May 4, 2015

Another pendant

Hi, everyone.  I'm so happy you are visiting at such a busy time of the year.  I've been busy, busy in the garden.  It's wonderful to be outside seeing everything come back to life after the dreary, long winter we've had. 

Obviously, the coming of spring has had an influence on my sporadic beading.  I've made another pendant and in colors that are so unlikely for me. 


Pink!!!  Not a color I use very often and yet it was the color I was drawn to when I looked at beads for this piece.  It was a project that a group of us worked on at Bead Soup.  Once a month a group gets together to work on a tutorial together. This one came from Nela Kabelova.   I go when I can and always come away with a component that I can then make into a necklace or bracelet.  Often the projects use some of the new bead shapes that are coming out at a rapid pace right now.  This one used two hole Rula beads as the basis of the bezel for the rivoli.  I had this rivoli in my stash and decided it was what I wanted to use.  Must be Spring Fever!  So, the bezel used Rulas, 11s and 15s.  Then the outer round used pinch beads.  It was a quick project and when I got home I decided to add some chain fringe with a some things from the stash and some leftover pinch beads.  I liked that the pattern recommended using a size 8 seed bead to attach the jump ring for the top and so I used that at the bottom to attach the chain.    Here are some details.


I love finding new ways to create a bezel and this was so easy that I'm sure I'll use it again.  I also like the idea of the chain fringe.  It gives the design some movement.
 
 
Thank you for taking the time to visiting today!  I really appreciate it and I hope you have a wonderful day.  I'll be in the garden taking advantage of the wonderful weather!