Showing posts with label Frilly and Funkie. Show all posts

Friday, October 30, 2015

Something Wicked

Hi, everyone!  Thanks for dropping by today, the day before Halloween!  I can't believe we're this far into the Fall season already.  Of course, things have been hopping around here so the time has gone by quicker than usual. 

I was really sad that I had not found the time to make any thing for Halloween or Fall/Thanksgiving.  Then The Frilly and Funkie blog had the theme of Something Wicked!  I really wanted to participate in this challenge!  It would force me to make at least one Halloween project.  I even had the base for what I wanted to do.  Well, I finally made the time and made this:


I had gotten the paper mache witch's hat at Michael's last year on sale.  I had plans to do something with it this summer.  Well, that didn't happen!  I always plan to do Fall and Halloween things in the summer but it rarely happens.  Anyway, I thought this was my chance to use the hat.  I painted it with black gesso and used Peeled Paint Distress Glitter on the edge of the brim.  I glued black feathers and glittered leaves as a hat band and then used a black and an orange die cut cat that I had from another sale package from Michael's.  The little purple glittered spider is also from the same package of die cuts.  I found some little skulls in my stash and glued that in front of the cat.  Using an awl, I poked a hole in the point of the hat and inserted a black wire with a glittered star on it.  Here you can see some details.


This is about as spooky as I get!  I love Halloween but not the way Halloween is now.  I don't like the gore and horror that has become so prevalent now.  I like the vintage Halloween of cute Jack-o-lanterns, cute little witches, black cats to go with them, and cute little ghosts out on the prowl .  So I do a lot of my own things for Halloween since I love to include it in my Fall decorating. 
 
 
I'm so happy that I decided to use this hat for the challenge.  I'm heading over to the Frilly and Funkie blog now to post it.  Check the other entries.  They are always great!
 
 
Thanks again for stopping by today.   I hope you enjoy your Halloween!


Thursday, February 5, 2015

It's almost Valentine's Day!

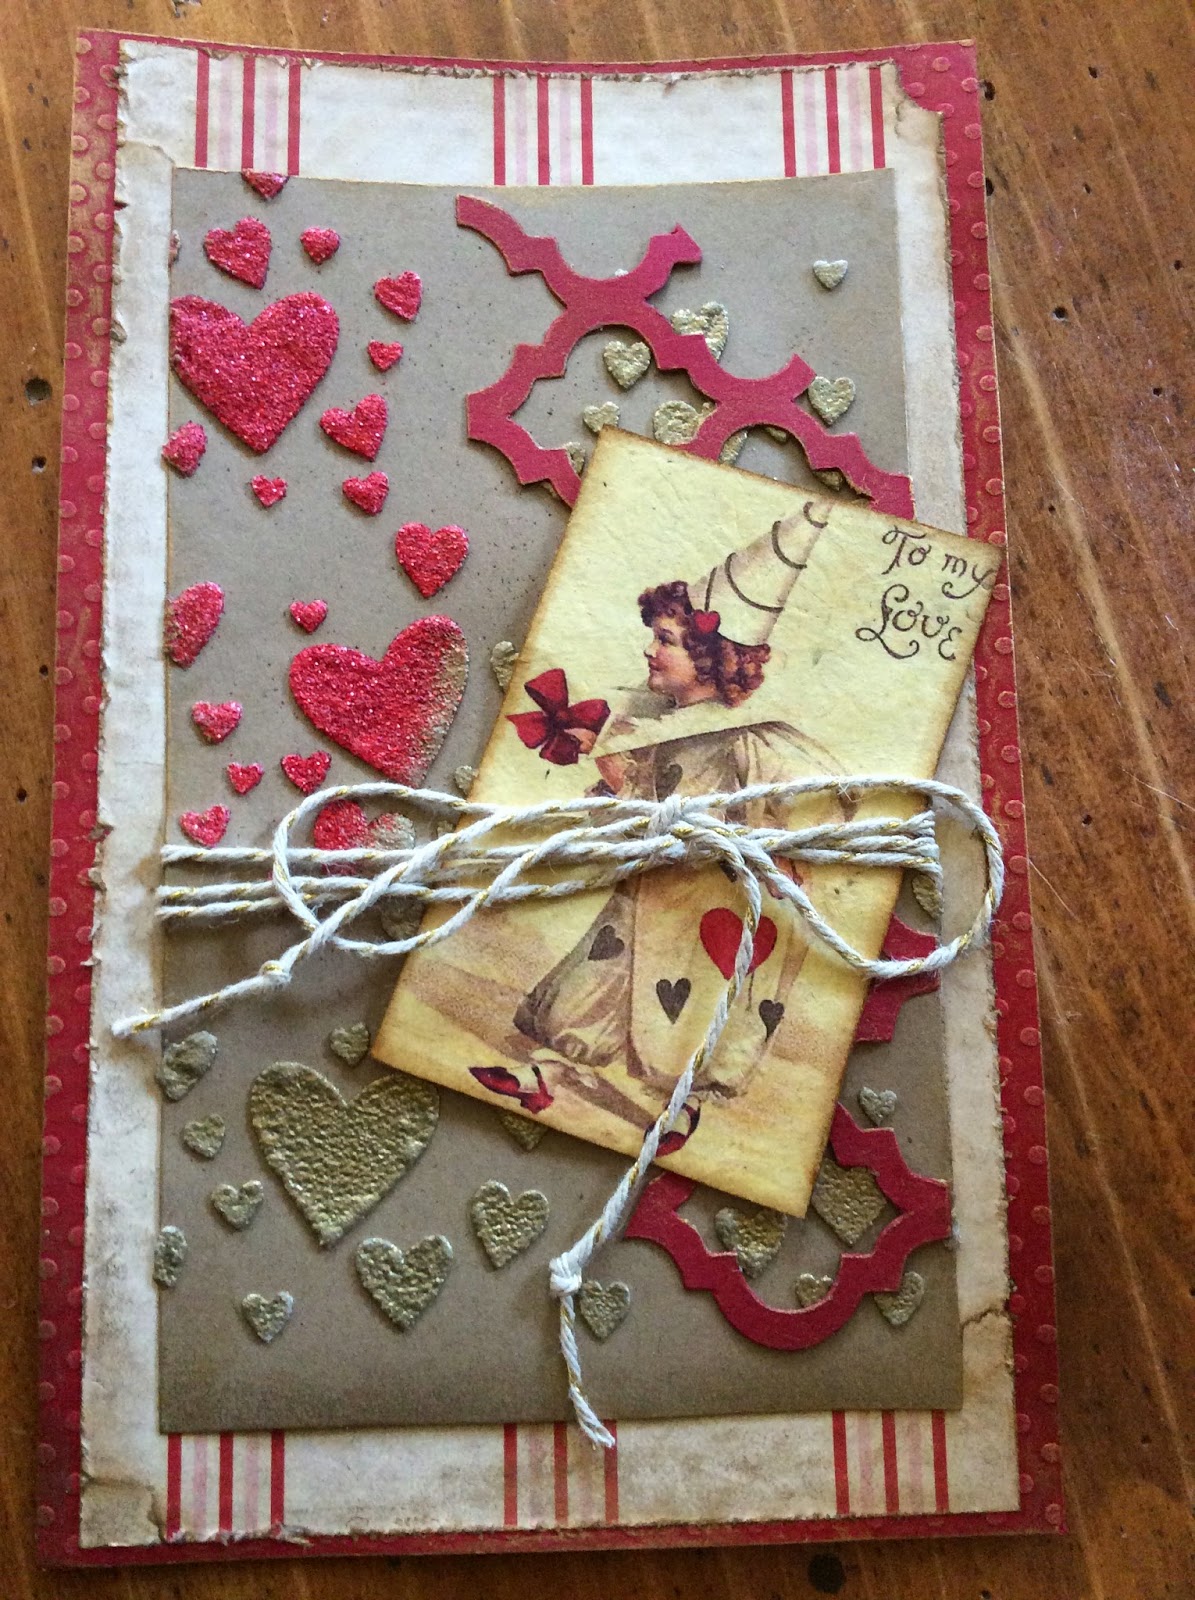
Hi all!  I'm happy to have you visit.  Well, I'm over winter now and I'm so happy that it's the first week of February.   To me that means that March is that much closer!  And, happy day, my crocuses and daffodils are showing their green!!  Crocuses are my favorite flowers because they are the first ones I see in the late winter and early spring.  Of course, February also means Valentine's Day is right around the corner.  I've been thinking of what I'm going to make for dinner that night and what yummy heart shaped dessert I'll serve.  I always have made a special dinner and dessert for my family on Valentine's Day.  I spend the beginning of February planning and making things to celebrate this pretty bright day in the middle of a dull winter.  This year, there are still cards to be made and dinner to be planned but I took some time to make a Valentine card to put on the table in the family room.  Since the Frilly and Funkie blog has as their challenge theme "Be My Valen-twine"for the next few days I thought I would enter it in the challenge too. The "twine" is the requirement to use twine in whatever you make.  Here is what it looks like.


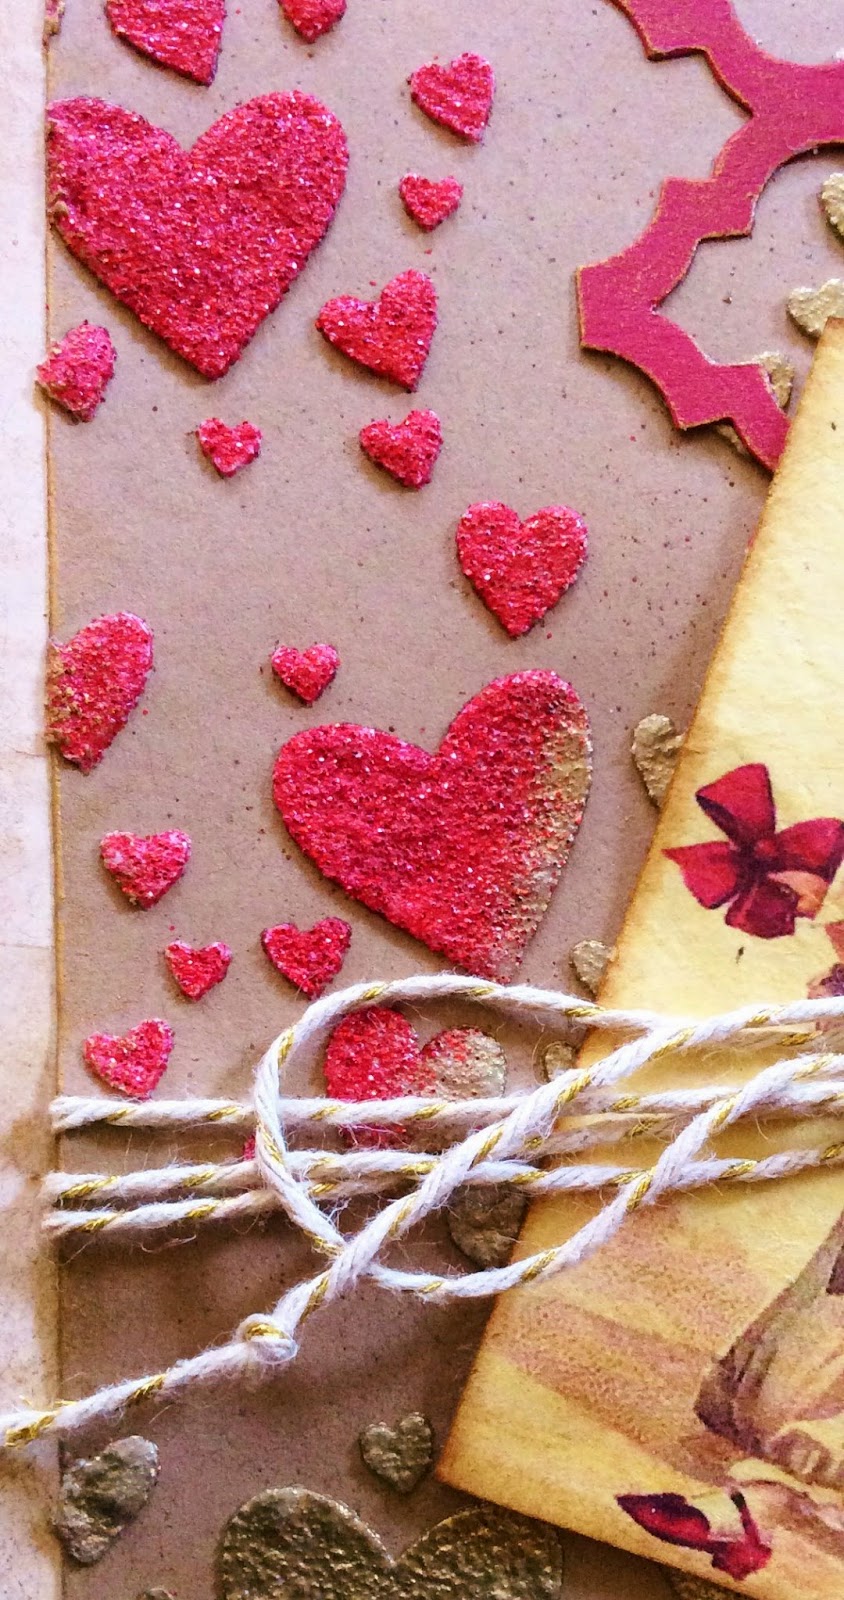
 I started with a piece of kraft card stock and used Wendy Vecchi's embossing paste and a new Memory Box stencil to make the background.  I tried a new-to-me technique I found on the very talented Astrid's blog.  While the embossing paste was still wet I sprinkled some of it with gold embossing powder and the rest with red glitter embossing powder and heated them.  I love the way the embossing paste bubbled and puffed.  I let the gold spill onto the red so I had a two toned embossing.   I cut a piece of red CS with the TH trellis die and used my finger to rub some gold Gilders' Paste on it.  I also rubbed Gilders Paste on the edge of the CS. I had the vintage Valentine clown image in my stash.  I wrapped the card with gold wrapped bakers' twine.  I glued the kraft CS to a striped paper that I had distressed and rubbed with Vintage Photo DI on the edge.  That was glued to a piece of red embossed CS which I rubbed with Gilders Paste.  Here are some details.


 So, there is my first Valentine for this year!  It looks great on the table. 

I have continued on with the #28patterns challenge which I talked about in this post. 

Here are two of the Zentangles I've posted the last couple of days.  


My initial done in Joanne Fink's Zenspirations style.


So, that's what I've been doing the last few days.  I think the Muse is beginning to wake up!  Must be seeing those crocus and daffodil leaves!!
 
 
Thank you so much for visiting with me today.  I hope you have a wonderful and creative day!


Saturday, November 23, 2013

Victorian Christmas Ornament

Hello everyone!  Thank you so much for joining me today.  I wanted to share with you a new ornament I made this weekend.  Everyone who knows me knows that I've made ornaments for years.  Our tree is a trip down memory lane for me.  I remember making each ornament and I love all of them.  They are also a creative history of my life and a remembrance of dear friends who gifted us ornaments.  Putting up the tree is a highlight of my decorating each year.  So, every year I try to add some new ones to the mix.  This year my first one is this.


I just got the Baroque and mini Baroque dies from The Funkie Junkie Boutique.   I decided to use them to make an ornament.  I glued Authentique paper in a holly pattern to the front of  a piece of chip board and a solid green to  the back. I  cut out the larger piece, then I used manila cardstock to cut the mini mover and shaper piece.  I used Festive Berries distress stain on the smaller piece and then embossed a holly branch with clear embossing powder.  I then swiped Picket Fence DS over it.  The embossed design resists the Picket Fence and you get a white washed look to the background.  This is a technique that Tammy Tutterow demos on her blog.  I love the look of it.  To cover the edges of the larger shape I ran Glossy Accents over it and used Pumice Stone Distress Glitter to edge it.  You can just see a little of the glitter running along the edge.  I then punched holes in the top and used a vintage green velvet ribbon as a hanger. 
 
To put it all together I attached the smaller shape to the larger with foam tape and used dimensional holly stickers top and bottom. The berries on the stickers have just a hint of glitter on them.   The strip with the greeting is a Graphic45 cut apart from last year. 
 
I was so pleased with how this turned out.  I love the shape of these dies and I think the whole effect is very "Victorian Christmas"!  Here's a detail.


With Thanksgiving not even a week away,  I'm getting into the holiday mood and really gearing up for Christmas.  Of course, I'm behind, so I'm really happy to have finished this ornament.  I'm entering it in the
Frilly and Funkie challenge which is Christmas Preparations. 
 
I hope you are having a great weekend.  I'm sure everyone is preparing for the fast approaching holidays and I really appreciate you taking the time to stop by.  I'll be back soon with more Christmas projects!


Saturday, October 19, 2013

Glenda's Spells Book

Hello everyone!  I have a fun little project to share with you today.   I call it Glenda's Spells Book.  As I was working on it I had a little story about a witch named Glenda running through my head!  She's a cute little witch who isn't very neat and makes a big mess while she's mixing her potions and brews!  I had so much fun making this canvas.  It's one of the most fun Halloween things I've ever made.  This is what it looks like.


I  told you she was messy
 
And, this is how I made it.  I sprayed the background with Dylusion sprays in Dirty Martini, Fresh Lime and Black Marble.  It took several applications because the spray beaded up on the canvas.  I then used ultra thick gel medium and a Tim Holtz stencil to get Glenda's splashes and spills on the canvas.  When they were dry I rubbed them with Inka Gold Rub in the green/gold color.  I dry brushed some lavender Silks over the stenciled areas.  Next I made the little book.  I distressed the edges and sponged them with Distress Ink.  Here's a close up of it.


I used the TH Apothecary Bottles die to cut the bottles.  The packaging the die came in was what I used so that I would end up with clear bottles.  Icolored them with alcohol ink.  Then I brushed rock candy crackle paint on the front. I have found that the crackle paint tends to flake off the acrylic packaging so I sprayed it with a clear fixative.  In one of the fortunate things that happens sometimes the spray wasn't well shaken initially so the bottles have some white speckles at the top which I love because it makes them look really old and messy!!   I picked up a tip from Tammy Tutterow to cut the bottle tops out of cork.  Once everything was dry I glued the tops on the back of the bottles and glued the bottles to the canvas.  The little book was glued to the canvas and the "beware" label was attached to the top. 
 
Here are some other details.


Glenda even managed to spill potions inside the book! 
 
 
I hope you enjoyed my little adventure with Glenda the Witch!  She's the kind of witch who makes you giggle!!  I'm going to enter this in the Frilly and Funkie challenge which is What's your poison.  You have to use green and black, and NO orange! 
 
Thank you so much for visiting today.  I really appreciate it!  I hope you have a wonderful day and you get to do something fun and creative.


Friday, August 16, 2013

In the style of Finn

Hello everyone!  Today I have a mixed media canvas that I did after my daughter and I took two classes with Anna Dabrowska, aka Finnabair, at our favorite paper arts store, The Queen's Ink, in Savage, Maryland.  We have loved Finn's work for a long time and were so delighted when we heard that she was coming to the Queen's!  We had two fabulous days of creativity and I'll share what we made soon.  But, I came away so enamored of Finn's technique and style of working that I had to make another piece somewhat like we did in class.  I had found some fantastic seaside papers that owner Patti had just gotten in.  This has been my summer for beach and seaside themed projects and so I just had to have all the papers.  They are truly beautiful.   I decided to use them to make one last beach project this summer!!  Here is the finished canvas.


I glued one of the sheets of paper down to an 8x8 canvas and used heavy body gel medium through one of Finn's new stencils. I used pieces of a shell themed napkin to add some transparent shells to the background.  Then, because I didn't want to cover the design of the paper, I used Perfect Pearls to spray the entire piece allowing the design to still be visible.  The shells and jelly fish in the corner and the border are the paper's design.  Then I got  out my collection of shells.  I've collected shells for years and I thought this would be a good place to use some of them.  I also used some shell beads and some chip board sea life pieces that Linda from Funkie Junkie Boutique gifted me in an order.  Thank you, Linda!  I played with the arrangement a bit, but it came together quite quickly.  I glued it all down with Glossy Accents, although I could have used gel medium, too.  I then took a sticker from the set of papers and put that at the top.  I sprayed the whole thing again with Perfect Pearls spray and used Silks transparent acrylics dry brushed over the entire piece.  I used my finger to rub some gold Gilders' Paste over the shells and some of the background.  Here are some details.


I'm very pleased with the way this turned out.  I love what I call Finn's encrusted look and I think this has that quality. 
I'm done with summer projects now!  I've put  all my summer papers and odds and ends away.  It's time to move on to late summer, Halloween and Fall.  But, I've  had so much fun remembering fun days at the beach. 
 
I'm going to enter this piece in the Frilly and Funkie challenge, which is By the Seaside. 
 
Thank you for visiting today.  I'm so happy to have you take the time to stop by my blog.  I hope you have a wonderful and creative day.


Tuesday, July 16, 2013

Under the boardwalk...

The boardwalk played a big part in my summers when I was young.  I grew up in the heart of Southern New Jersey and so summer meant long weekends at the beach.  My family spent most of our time in Ocean City, New Jersey, which is a little south of Atlantic City.  But, we also went to Atlantic City.  My mother and her best friend, with me tagging along, would go down to AC for the day during the week several times over the course of the summer.  There was blanket room on the sand during the week!  You could eat on the beach back then, (I know I'm dating myself!) and my mom would pack a picnic lunch and we would head on down the road for a day on the beach.  It was a glorious, carefree time for me and I have great memories of it.

At the beginning of this summer I found that Linda from Frilly and Funkie Boutique had an Artistic Outpost stamp set that had vintage images of Atlantic City that I just to have!   I also have a set of stamps with vintage beach images from Alpha Stamps.   Add to that the fantastic summer paper collection from Authentique and I knew I had to do some thing to celebrate Atlantic City and summers past!  This is what I came up with.


It's a canvas that I painted and sprayed and used some beachy napkins on and then collaged with all the things that reminded me of Atlantic City in it's glory days.   That building in the lower left  is the Steel Pier on the boardwalk.  I have to say that the image predates me because I don't remember that cupola on the top!  It probably got washed into the ocean during one of the many hurricanes that hit the coast in the '30's, '40s and '50s.  Yep, Sandy wasn't the first!!  I particularly love the Atlantic City tokens and the Steel Pier tickets that are part of the stamp set.  Along the bottom of the canvas I used layers of Distress embossing powder because of it's sandy look and I glued a vintage Lucite shell bead and some sequin shells in the "sand".  The finished canvas really makes me smile every time I look at it!  Here are some close ups.


The Steel Pier in it's glory days!


Those Atlantic City tokens
 
And the Steel Pier tickets along with an Art Deco sign telling everyone to relax at the shore!
 
The vintage shell bead and some sequins and beach "stones"!
 
 I had such a great time creating this collage.  I've decided to take the leap and enter it in the Frilly and Funkie challenge whose theme is Summer. 
 
I hope you're having a great summer.  I know some of you don't like the heat, and it does get to be a bit much, but it's a happy time of year when we can relax and not feel guilty!
 
 
Thank you all for visiting.  I really appreciate it.  And, welcome to all the new visitors.  Have a great day!